Automating Secure Database Credentials with Terraform
Every new environment (dev, staging, prod) needs its own database credentials. Making them up by hand doesn’t scale and it’s slow, inconsistent, and one weak password away from a problem.
So I built a Terraform project that generates them automatically.
What it does:
Generates a random 4-character ID to keep every username unique
Generates a 16-character password with a locked-down set of special characters
Combines the app name, environment, and ID into a clean, readable username (e.g. superapp-staging-admin-xdfg)
Builds a ready-to-use database connection string from the username and password
Why it matters:
No more manually inventing or reusing passwords
Usernames are traceable to app + environment at a glance
Passwords and connection strings are marked sensitive, so they never print to the console by accident.
The Scenario
You are a Cloud Engineer working for a startup. Your developers constantly need temporary, secure database credentials generated for different application environments (like dev, staging, or prod).
Instead of making up passwords manually, you need to write a Terraform project that automatically builds a unique username, a secure password, and a formatted database connection string.
Your Checklist / Requirements
- Variables (variables.tf):
- Create an input variable named application_name (type string).
- Create an input variable named environment (type string).
- The .tfvars File (terraform.tfvars):
- Set application_name to “superapp”.
- Set environment to “staging”.
- Random Resources (main.tf):
- Use random_string to generate a 4-character, lowercase-only string (no numbers, no special characters). This will act as a unique ID.
- Use random_password to generate a 16-character password that does include special characters. Use override_special to make sure it only uses safe characters: !#$%&*()-_=+[]{}<>:?
- Local Variables (main.tf):
- Create a local variable called db_user that uses string interpolation to combine the app name, environment, the word “admin”, and your random 4-character string. (Example output: superapp-staging-admin-xdfg)
- Create a local variable called connection_string that combines your new username and your random password into a standard format: “Server=tcp:mydatabase.azure.com;Uid=[USERNAME];Pwd=[PASSWORD];”
- Outputs (outputs.tf):
- Output the database_username in plain text so the developer can see it.
- Output the database_password and set it to sensitive so it doesn’t print on the screen by accident.
- Output the full_connection_string and set it to sensitive as well.
Solution
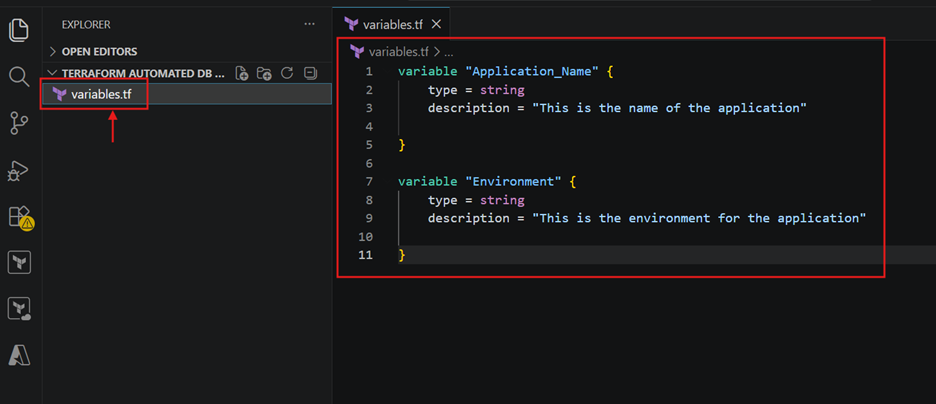
- Create variables.tf:
- Declare Application_Name as string input variable, with a description.
- Declare Environment as string input variable, with a description.
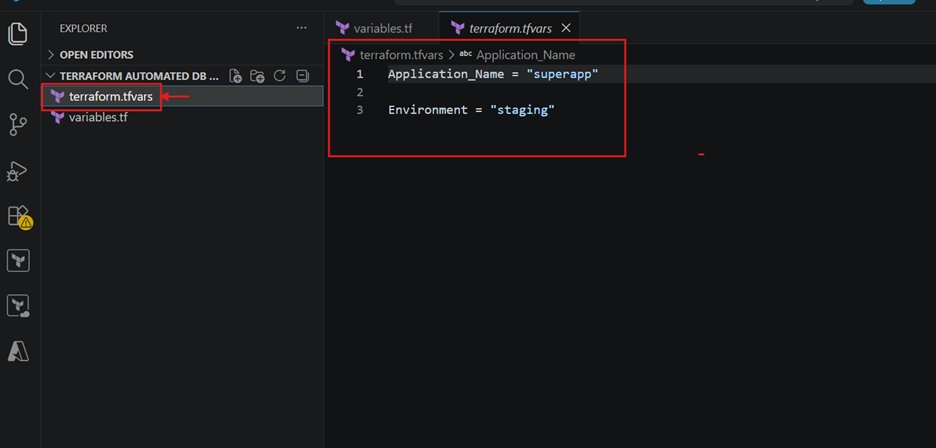
- Create terraform.tfvars :
- set Application_Name = “superapp”
- Environment = “staging”
3. Create main.tf and declare the provider:
- add a terraform block requiring hashicorp/random, a terraform version (~> 3.5), and then a provider “random” {} block.
- Add the random_string resource (user_suffix): length 4, special = false, numeric = false, upper = false.
- Add the random_password resource (db_password): length 16, special = true, override_special = “!#$%&*()-_=+[]{}<>:?”.
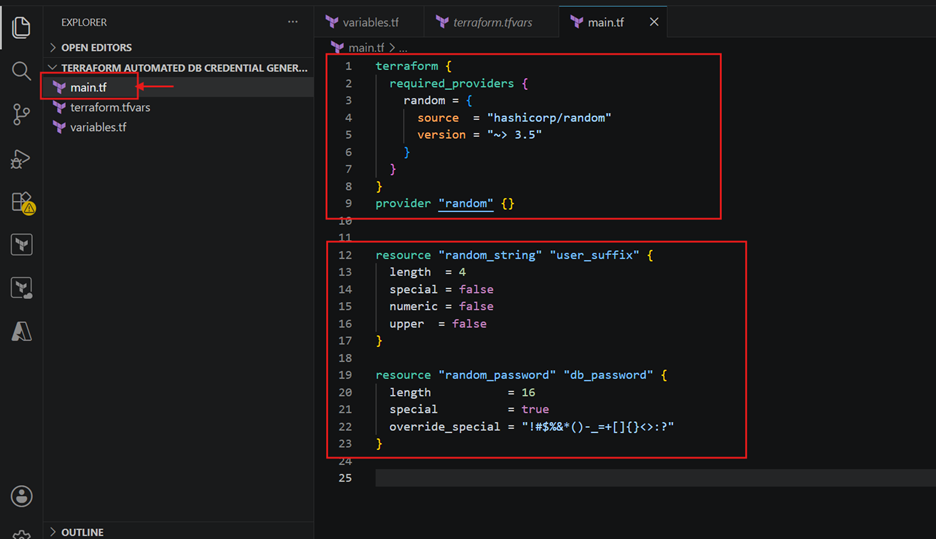
4. Add a locals block in main.tf :
- build db_user by interpolating app name, environment, “admin”, and the random suffix;
- build connection_string from local.db_user and the generated password.
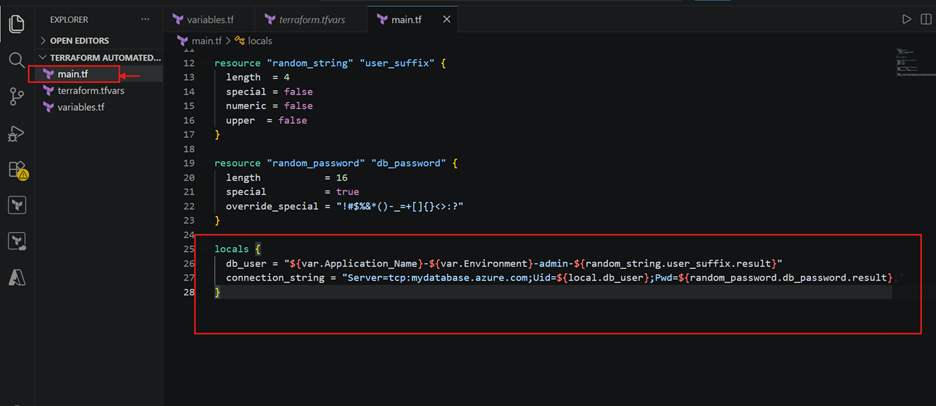
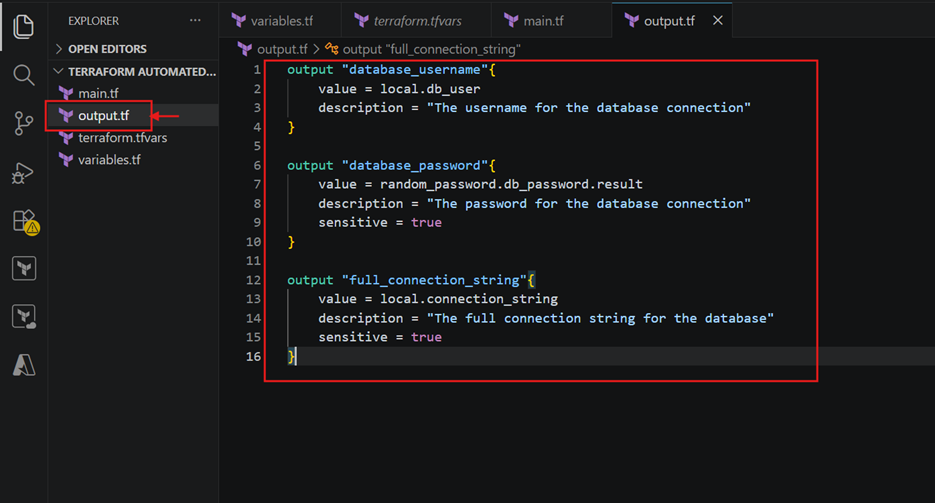
5. Create output.tf:
- Build output database_username with value from local.db_user, and a description. No sensitive flag, since usernames are safe to display in plain text.
- Build output database_password with value from random_password.db_password.result, and a description, also add “sensitive = true” so it doesn’t print in the terminal.
- Build output full_connection_string with value from local.connection_string, and a description, also add “sensitive = true”, since it contains the password embedded in the string.
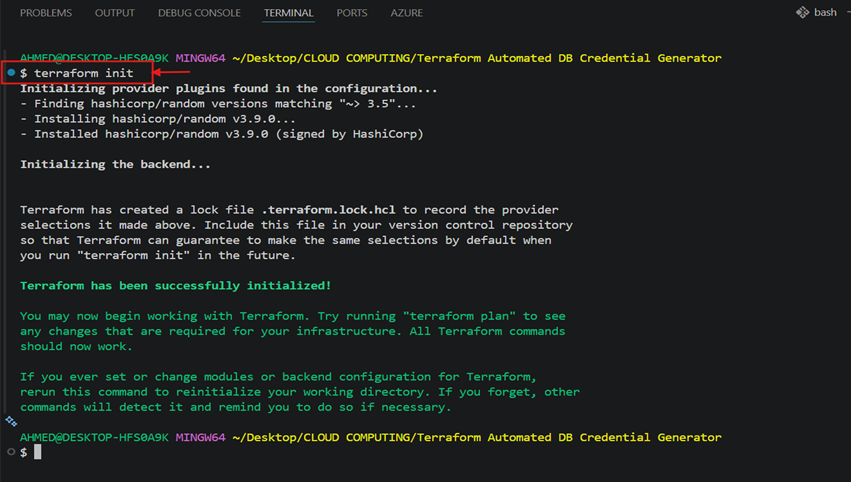
6. Run terraform init, it downloads/installs the hashicorp/random provider and initializes the working directory.
7. Run terraform plan, it review the 2 resources to be created and confirm the three outputs will populate.
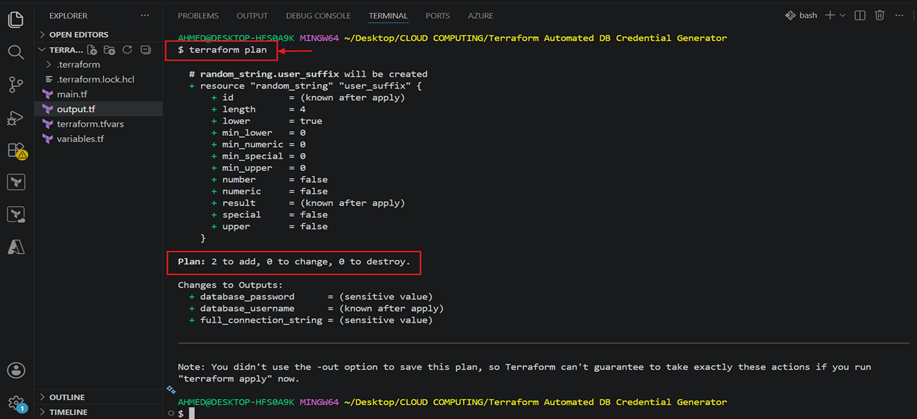
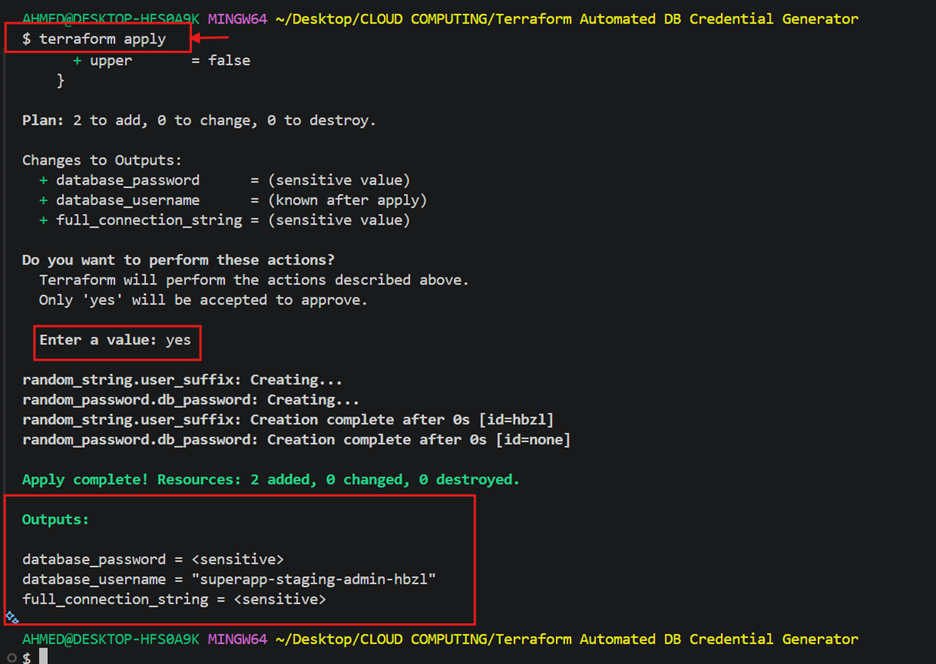
8. Run terraform apply and confirm with “yes”. Resources get created, and outputs print: database_username = “superapp-staging-admin-hbzl”, with password and connection string hidden as sensitive.